Create a Codepen promo watermark with no additional HTML, CSS or JS
{% youtube ‘pfzz0YyNyEo’ %}
I use CodePen a lot. I’ve got hundreds (if not thousands) of pens. Most of them are throwaways, but some are things that I like to share. As a blogger, I like to drive people back to my blog from my Pens when possible. You can add a link in your Pen’s details, but that’s usually not visible.
I’ve seen quite a few bloggers and tutorial authors add a watermark on their Pens. A little logo and link in the bottom corner of the Results tab.
This can be a helpful promotional option, but you don’t want to clutter up the code in a tutorial to add it. In this article, we’ll explore using JavaScript, CSS and CodePen’s built-in importing functionality to add a global watermark that you can add to any Pen.
Using JavaScript to add DOM elements to the page with DOMParser()
First things first, we need HTML in a new Pen. We don’t want to actually add this as HTML in CodePen, though. We can’t import that into a new Pen.
We’ll write our HTML in the JS panel.
const el = ( domstring ) => {
    const html = new DOMParser().parseFromString( domstring , 'text/html');
    return html.body.firstChild;
};

let watermark = `<a href="https://bryanlrobinson.com" class="watermark">
                     <img src=https://d33wubrfki0l68.cloudfront.net/b24205ea683598e08044085 0f96244c76f0128c55/65a21/images/logo.svg">
                 </a>`

document.body.append(el(watermark));
In this code, we’re defining a new function to create an element from a string of HTML, defining the string, and appending it to the body.
Let’s run through this piece by piece.
Our el() function takes a string that’s formatted as HTML. It uses JavaScript’s native DOMParser() methods to convert the string into a set of DOM nodes in a new DOM. We then return the first child of the body in our new DOM. If your HTML has multiple siblings, then you’ll want to adjust that return.
We then build our HTML in a template literal. For our HTML needs, we need an anchor tag sending users to whatever promotional item we want. We also need some content for that anchor. I’ve chosen my logo which fits nicely in a little watermark.
Finally, we add the new element to the document at the end.
Using CSS to position and animate the watermark
We don’t need a lot of CSS to make this work. There are two things we need to do.
First, we’ll position the element at the bottom right and have it be fixed to allow the content of the page to scroll behind it.
By default, since this is the last item on the page, it should appear at the top of most z-index stacking contexts.
.watermark {
    position: fixed;
    bottom: 1rem;
    right: 1rem;
}
From there, we also want to add an opacity to the element, so that it’s unobtrusive, and add a slight transition that we’ll utilize with a hover state to full opacity.
.watermark {
    position: fixed;
    bottom: 1rem;
    right: 1rem;
    opacity: .5;
    transition: .3 ease-out;
}

.watermark:hover {
    opacity: 1;
}
Now that we have something that looks right in this pen, it’s time to add it to our other pens.
Using CodePen’s interface to import our CSS and JS

So, how can we add this to our other pens. The answer is as simple as CodePen has made most everything.
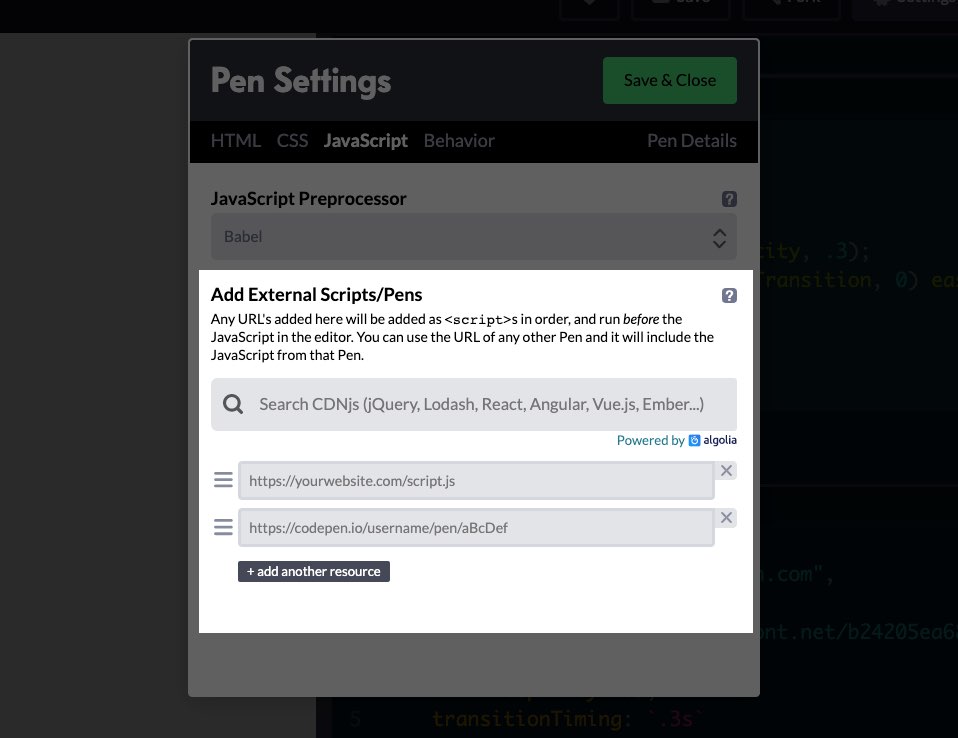
You’ll go to the settings for both the JS and CSS panels in CodePen. From there, use the “Add External Scripts/Pens” area and past in the URL to the new watermark Pen. This will import the JS and CSS respectively.
Your watermark should now appear on your regular pen at the bottom right!
On Codepen
Here’s our example on Codepen:
{% codepen “https://codepen.io/brob/pen/yLyPveY” “js,result” %}